I had several people ask how I am making my masks so will do a quick tutorial on a compilation of techniques that I find work well for the style that I am currently making. There are so many great mask patterns out there now and I have tried many of them over the months. I find this one to be the easiest for me to wear. I feel it gives more room to breath, fits well and does not slip up or down while talking.
I've come up with four different sizes, large (men), medium (women/teens), small (children 6-12) and extra small ( kids 4-6).
First off are the measurements I use. You can adjust them to your preferences.
LG.....11" x 8"
MED....10.5" x 7.5"
SM..... 9.5" x 6.5"
XS.....9" x 5.5"
The measurements I used to cut the corners are as follows:
LG....2"
MED....2"
SM....1.75"
XS.....1.5"
Elastic measurements
LG....10.5"
MED....8.5"
SM....7.5"
XS....6"
Here we go........
I first cut a lining fabric and a mask fabric using the previous measurements. If you are using a directional fabric you must make sure that you cut it with that in mind. The short measurement will go vertically on your face while the long measurement will fit across your face. I also find that doing two or more masks at the same time saves time and thread.
Mark each corner with the above corner measurements like this:
You will then make a diagonal cut on each corner by placing your ruler diagonally, lining up the markings you have just made.
If you have this nifty Bonnie Hunter Simple Folded Corners ruler you can pass on the marking and just line the fabric up with the ruler.
You will now cut a gentle curve for your eyes along one long side. Again, be careful here with directional fabrics. Can you tell that I have had too many upside down cats and pigs? Find the middle on the top of the long side of the fabric. From the edge corner to the center draw a gentle curve, going no deeper than 1/2". Repeat from center to other corner. It will look like a very lazy "w". Cut both layers of fabric, right sides together. My granddaughters call this the "batman" curve.
You're now ready to sew.....
Again with right sides facing each other, start sewing midway along the bottom long edge. You will sew with a 1/4" seam, pivoting at corners and continuing around the mask, leaving about 1 1/2" opening.
Top stitch across bottom, closing the hole that you left for turning.
You will now form the curves to your mask. There are many You Tube videos on this process. One is HERE. On the back side of the mask you are going to make two "N" folds on both edges. Take the top fold and fold upwards forming the N. Repeat with the bottom fold. Stitch straight down from the top, backstitching at the top and bottom. It will look like this:
Repeat on other side.
Place a piece of elastic, lengthwise, in the middle of the area between the N fold stitching and the edge of the mask. Fold edge back up and over the elastic and stitch down, enclosing the elastic. Again, backstitch at the beginning and end. Repeat on other side. Tie ends of elastic or leave loose for recipient to size accordingly. Once tied, the knots are pulled into the channel.
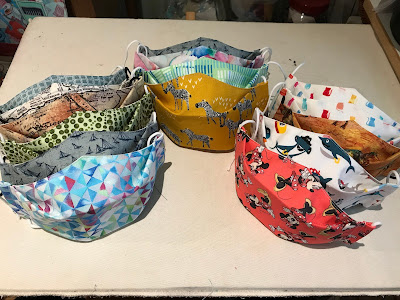
If you are doing several different colored masks you can match the threads to the mask by simply switching out the bobbin when doing the top stitchings. These are the masks I made yesterday while doing the tutorial. They go up so quickly.
TA DA....you are done. Now you can do 50 more this week.


