Thursday, September 29, 2016

Cluck, Cluck

My sister-in-law has been a chicken fan for years.  She would love to have boutique chickens strolling through her yard, merrily clucking away.  My brother does not have the same desire so she has to settle for chicken decor in their home - nothing alive!

We had the opportunity to celebrate our fall birthdays at the beach last week and I gifted her a "sassy chick for a sassy chick".


The pattern was from Fat Cat Patterns and I used Lara Buccella's Crafted Applique technique to applique the chicken pieces.  I love this technique as there are no frayed edges and the fabric has such a soft "feel" to it.

While we were all together to celebrate birthdays we took a side trip to the Santa Barbara Zoo.  It is such a nice little zoo and they had just introduced their newest baby giraffe.


Isn't it sweet?

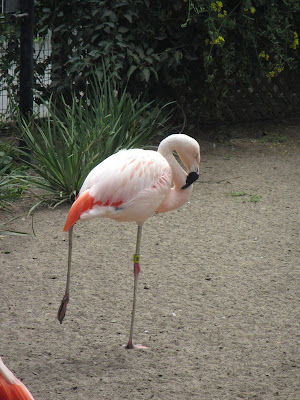
I wonder how long I could stand like this - much less, take a nap.


Nice kitty....... good thing there was glass between us.


Of course we had to drive down to the docks and see what was being brought in for the daily catch.  This boat delivered 150# of sea cucumbers - slimy looking things, but I didn't get a picture.  ;-(  They looked like chopped off octopus tentacles.


I watched three little ones yesterday and one little one during "quiet time" yesterday managed to push enough buttons on the alarm clock to set off the alarms last night.  It was invigorating to know that it was 12:00 a.m, AND 4:00a.m.!!!!  Since we never use the alarms, we had to fully awaken (both times) and locate the eyeglasses to figure out how to turn them off.  I will have to be sure and thank the children when I see them.  ;-)

Saturday, September 24, 2016

The Grinch and Binding Tutorial

I recently had a friend who was apprehensive about doing her own machine binding on her quilts.  I was trying to explain how easy it really is to get a nice finish on machine applied binding and thought I would do a tutorial on the method that I have come to find the easiest for me.

First off you will need a quilted sandwich.  Since I have just finished my Grinch I will use this as an example.


Square the piece up.  Now add the total measurement of all sides and add 10".  That is the length of binding you will need.  My total came to 69".  On machine binding I use 2.5" wide binding as it gives me a bit more room for the stitching.  I like to miter my binding pieces together.  To do that I lay piece #1 across my cutting mat and lay piece #2 at a 90 degree angle away from it.  Draw a line from corner to corner and stitch.  (I used leftover binding for my quilt so these fabrics are simply samples).


Stitch across that line and cut off the triangle pieces on bottom right side.  Iron piece out flat.  #2 fabric now becomes the #1 piece.  Repeat until total length is met.


Iron entire binding in half lengthwise.  You are now ready to stitch it onto your quilt.

I prefer to start at the center of the bottom of my quilts.  Lay the starting edge with raw edges together with the quilt's.  Start stitching about 4-5" from the beginning edge - leaving a loose tail at the beginning.


Stitch along lower edge to 1/4 inch from the edge.  Stop and lower needle, pivot 45 degree and stitch off the edge.


Fold the binding up and back like this.


Now......fold the binding back to the left with the fold right along the edge you just stitched.  You will now be ready to stitch the next edge.


I like to backstitch at the beginning of my next row to lock it in place.  Continue around the quilt doing the nice miter technique at each corner.

Stitch until you are about 4" from the "tail" end of the beginning binding.  Remove quilt to cutting table.


Lay the loose binding back over the top of the "tail" and mark it 2.5" from the end of the "tail".


Cut off excess binding along the marked line.

Open out the tail edge and mark 2.5" in from top edge.  Draw a line to the lower left corner.  This will be your stitching line to give you your last seam with a nice miter.  This step can also be done before the binding is applied.


Take the two opened ends of the binding and place together like this.


Stitch together and cut away the triangle.


Finger press seam to side and fold binding back in half.  Stitch down - meeting the stitching at the beginning of binding.


At this point I take the quilt to the ironing station and press binding towards the outside.  Do not skip this important step!!!


Take back to cutting table for gluing.  I use a glue stick for mine.  It adheres quickly and really sticks.  Apply glue little sections at a time - along raw edge of quilt in area between raw edge and the seam line made when attaching the binding.

Fold the binding just over the seam line - 1/16-1/8".  Continue to corner.


At the corner continue fold out to the end.  Apply glue to the corner and the next section along the next side.


I like to use my seam ripper to tuck into the corner to get a nice crisp mitered corner.


Continue all the way around the quilt.

You are now ready to stitch it down.  Since the stitching will be visible on the back binding, I use a bobbin with thread the color of my binding.  The top thread is whatever matches my quilt.  It is hardly visible, but can be seen.  

Returning to the sewing machine, start stitching "in the ditch" right along the binding on the front of the quilt.  Having the binding ironed back makes this task pretty easy.  Once washed or relaxed, the binding will roll back to pretty much cover that line of stitching.


The view from the back.......  As you can see, the binding is just caught in the stitching and is practically invisible from the front.


Ta da......perfectly mitered corners and all!


The Grinch is now ready for his Christmas appearance.


If you have any questions, please don't hesitate to ask.  If you give it a try I would love to hear how it worked for you.

Linking up with Quilter's Monday.


Linking up this week with Freemotion by the River.

Thursday, September 15, 2016

Quilting Retreat

Can I just say that a quilting retreat is a blast?   We had four spectacular days of sewing, shopping, cooking, eating, watching sunsets on the beach, laughing and visiting.  It's amazing how much can be accomplished when you have no interruptions.


These are the three gals who joined me - Elizabeth, Lisa and Leisa (with Elizabeth's and Leisa's finished quilt tops).


Elizabeth was our "official" photographer for the retreat so you can check out her BLOG to see our fun documented.  She did an incredible post on it and I won't even try to compete with it.  She also posted on IG at #beachsidequiltingretreat while we were there.

There were wonderful gifts exchanged.  Look at all of the great new items I was showered with on my first retreat.


So....what did I accomplish?

My tree skirt is finished.  Thank you, Connie, for the help in finding her old post where she made the beautiful tree skirt that I duplicated.


I managed to piece my Allietare quilt from Bonnie Hunter's QAL last winter.  I love, love, love the colors in this.  I'll get my borders on and get it quilted, hopefully, before the next QAL this winter.


I thought this Grinch paper pieced design was so cute and had so much fun stitching this one up.  It is a free Kristi Lehame design from Peachblossom Patterns.


We made red X blocks for the #70273 Project Brigade.  You can read all about it HERE.  Be sure to check it out as I am sure you will want to join in on this project.  If you as as touched as I was,you will want to make many more red x blocks because of their significance.


Are any of you familiar with Peppa Pig?  The grandkids here love the show and I found some great flannel for a nightgown for an upcoming birthday gift.


There were several other finishes, but those are secret for the moment.  I will show them later.

We contributed a bit to the economy on our outings (as you will see on Elizabeth's posts) but in one antique shop there WERE two of these gorgeous Le Crueset pumpkin pans. We scored big time on these.  They worked really well on making bread for dinner when we got home.  They also look beautiful sitting on the stove for fall!


Returning home I had a lovely package in the mail from Wendy of Ivory Spring.  I had won these beautiful Rosewater FQ by Windham.  Thanks, Wendy.  I will enjoy these beautiful prints.


Now to finish unpacking and getting the sewing room back together!